Skip to main content
College of Science
&
Department of Physics
Sitemap
Search
BoxSand – Flip the Classroom
Main Navigation
Review & Vectors
Mechanics
Thermo/Fluids
Oscillations & Waves
Optics
Electricity & Magnetism
Breadcrumb
Back to
BoxSand
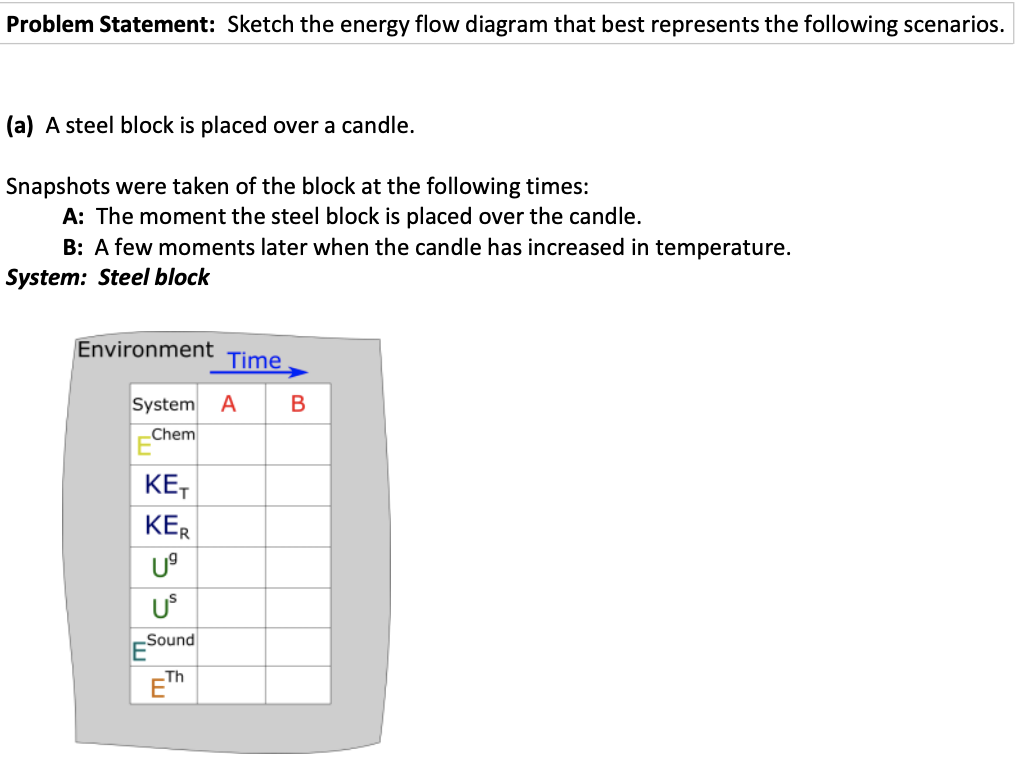
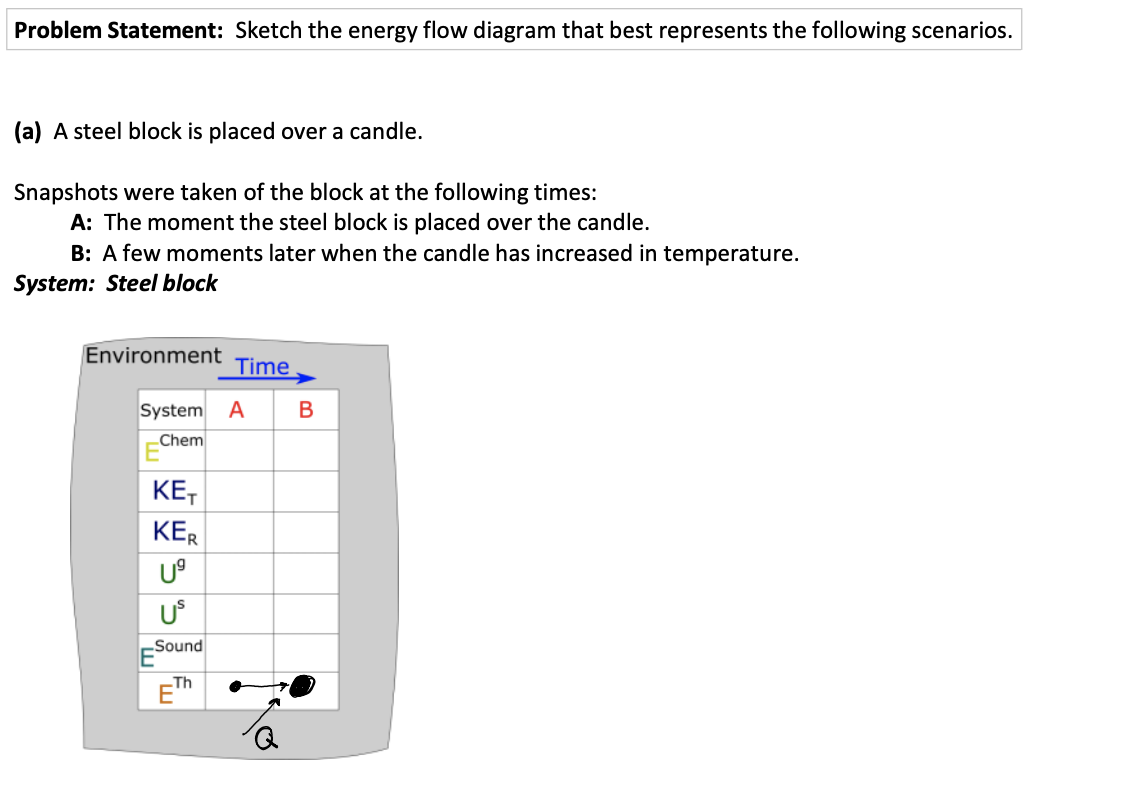
Energy Flow Diagrams: Part A
Energy Flow Diagrams: Part A
Energy Flow Diagrams: Part A
Solution